Update on home life and DIY
So, I'm sorta back to normal. Still have sniffles and the usual less than stellar feeling you have after coming off a cold. It's been a whirlwind last week, and we've had some friends 
So far we have our basement painted as well as the living room (twig brown I think). Along with some continuous unpacking with the wife, I've been tasked with some interesting activities around the homestead. To start, just few light fixtures jobs around here and there. Then the assembly of my arsenal of cooking weapons.
Things went fairly smoothly with the easy stuff, so I was tasked with the next level of chore. The installation of the dish washer!
Side note: I've never had to install any real major appliance (refrigerators and stoves are hardly difficult - just plug in). Now, I did actually setup our washer and dryer so I did get a introduction to appliance installation. The dryer exhaust connection wasn't hard and the washer was just time consuming. Most of the time spent was because my washer is a front loader so I had to level it quite precisely (which was what took most of the time).
So back to the dishwasher - we bought it last Thursday from Sears and were told that it would arrive this Wednesday. Well we got a call on Tuesday, our dishwasher came early! So Britgal and I rushed over to borrow the van from inlaws and pickup our dishwasher. You can see the boxed dishwasher there on the right; it was quite heavy!
First step, unpack the dishwasher. The directions on the box say to cut along the bottom and remote the carton. So I do so and it wasn't so hard - Sheza!
So now that the dishwasher is unpacked, I can behold it's glory and power! So far so good - I don't see what's so hard about this. It still has that new dishwasher smell - mmmm. Now a
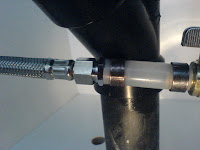
Step one, connect my inlet line to my water supply. Hmmm, I recognize the shutoff valve, and I know that the tubes are PEX plumbing but what is that on the end? The guy at Rona just said it's a cap, but it sure isn't poping off... grrr. So I direct my attention to the drain hose, cut the holes and start trying to route all the cables. Wouldn't you know that the drain hose is like a foot too short! Damn! So after a couple hours of messing around, I called it a night and figured I had to go to the Homedepot for some more tools and parts since the compression fitting on the inlet hose didn't fit the PEX and the drain stub on the drain pipe for connecting didn't have a hole, so I was puzzled. Obviously I need to make a hole, but did that mean there was a punchout I had to open, or did I have to cut it open?
So today I went to the Homedepot and picked up some info - I was, in fact, missing some parts. I needed a compressio
I cut off the end cap and rings, put my own rings on, and stuck the compression fitting in and re-crimped the tube. Yes, success is mine!
I continued attaching my drain tube, cut off the top of the drain connector and clamped it down with some metal clamps. Then I connected the three main services to the dishwasher itself. Electrical, water and then drain.
So with the electrics, water and drain all connected and ready to go, I push the dishwasher in, and run it through a cycle to test all the connections. It all goes fine and I level, and screw the washer into place to finalize the install. Here is the final product - whew! Overall, it wasn't too bad, but without the right tools, life is really hard! Once the tools where acquired it went fairly quickly and smoothly. The maiden wash is this evening with our dinner dishes, I'm sure it will go well. I'm not sure what's next, but I'm sure I'll figure it out :) The best part about installing the washer, is that I know what to look for when problems occur (at least basic problems like leaks etc). Can I get a Noriega?!!


No comments:
Post a Comment